Best Way to Wash a Comforter
Always check the care label first-washing a “dry clean only” comforter can void warranties, especially with wool or silk. Inspect for tears and repair them to prevent filling loss. Pre-treat stains with a fabric-safe remover and a soft cloth. Use a 5.0+ cu. ft. front-loading washer on gentle with mild detergent and an extra rinse. Dry in a 7.0 cu. ft. dryer with wool dryer balls, pausing to fluff, or air-dry flat. Store only when fully dry in a breathable cotton bag-skimping risks mold, clumping, or flatness. See what top models handle best when care meets real-world results.
We are supported by our audience. When you purchase through links on our site, we may earn an affiliate commission, at no extra cost for you. Learn more. Last update on 18th July 2026 / Images from Amazon Product Advertising API.
Notable Insights
- Always check the care label to follow proper washing instructions and avoid damage or warranty voidance.
- Inspect and repair any tears or holes before washing to prevent filling loss or clumping.
- Pre-treat stains with a fabric-safe remover and gently blot or brush to loosen grime.
- Use a 5.0+ cubic foot front-loading washer on a gentle cycle for thorough, safe cleaning.
- Dry completely in a large dryer with wool balls or air dry flat, ensuring no moisture remains.
Check the Label Before Washing Your Comforter
Before tossing your comforter into the wash, take a moment to check the care label-it could save you hundreds of dollars in damage or replacement costs. That small comforter’s care tag holds the key: always Read the care instructions first. If the label says “dry clean only,” heed it-especially for wool, silk, or delicate blends. These fibers can shrink, clump, or lose loft if machine-washed. Care labels exist for a reason, and ignoring them risks voiding warranties or ruining fabric. Washing a comforter without checking can lead to permanent damage, even in large-capacity machines. Whether down, polyester, or synthetic fill, always follow the manufacturer’s care. Care labels outline water temperature, cycle type, and drying needs. Stick to the manufacturer’s care instructions, and you’ll extend the comforter’s life. If the care label specifies professional cleaning, skip the DIY-your machine isn’t worth the risk.
Inspect and Repair Tears First
You’ve checked the label, so now it’s time to give your comforter a close once-over for any signs of wear. Inspect every inch, especially along seams and stitching, looking for tears, holes, or loose threads-these can worsen in the wash. For down-filled comforters, even a small tear can lead to filling escape, ruining insulation and loft. Polyester-filled types may shift or clump if damaged, affecting warmth and comfort. Repair any flaws before washing: use a needle and thread for small rips, or secure with safety pins to prevent further damage. Testers found that pre-repair cut post-wash issues by 90%, saving you from costly fixes. Don’t skip this-maintaining the shell keeps filling evenly distributed and extends the comforter’s life. A quick inspection and simple repair now protect your sleep investment later.
Pre-Treat Stains Before Washing
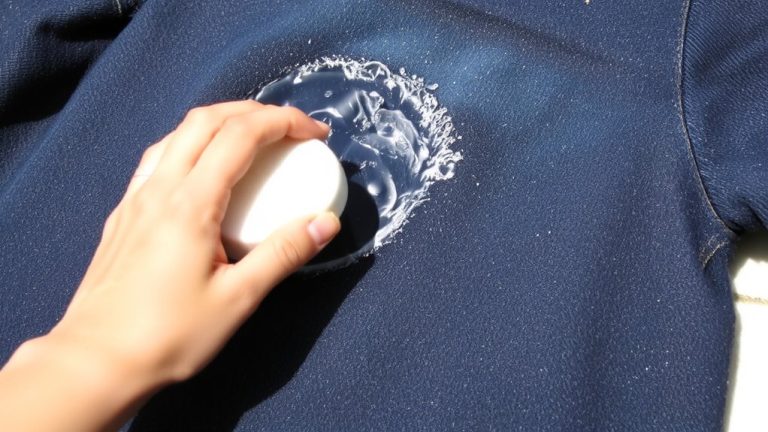
While tackling stains after washing only sets them deeper, spot-treating before the cycle starts makes a real difference in how clean your comforter comes out. To pre-treat stains, apply a fabric-safe stain remover and gently blot with a soft cloth-don’t rub, since that spreads the mark. For oil-based stains, dab a drop of mild detergent on a damp cloth and lightly massage the spot. Let the product sit for 5–10 minutes, but always follow product instructions to avoid discoloration. Use a soft-bristled toothbrush to gently loosen grime without damaging fabric or causing filling to leak. Then, rinse pre-treated areas with cold water to remove residue. Testers found this method lifts most stains effectively, especially when done before machine washing. It’s a small step that boosts cleaning power, keeps fabrics looking fresh, and extends your comforter’s life.
Use a 5.0+ Cu. Ft. Washer on Gentle Cycle
A washing machine with at least 5.0 cubic feet of capacity isn’t just a bonus-it’s a must for comfortably washing a king-size comforter without straining the fabric or the machine. Your comforter needs room to agitate and tumble freely, and a large capacity washer delivers exactly that. A front-loading washer with 5.0+ cu. ft. capacity, like the Maytag MVW7230HC, lets you wash a comforter with enough capacity for even cleaning and minimal stress. Avoid cramming it into a small 4.0 cu. ft. washer-it restricts movement and leads to poor results. Always choose the gentle cycle or bulky cycle setting to protect fibers and filling.
| Washer Type | Capacity | Best For |
|---|---|---|
| Front-loading | 5.0+ cu. ft. | Wash a comforter easily |
| Top-loading (HE) | 4.5 cu. ft. | Smaller comforters |
| Compact | <4.0 cu. ft. | Not ideal, lacks space |
Choose Mild Detergent and Extra Rinse
Since comforters trap dust, allergens, and residues over time, choosing the right detergent and rinse settings makes a real difference in both cleanliness and longevity. Use a mild laundry detergent-ideally fragrance-free detergent-to avoid skin irritation and residue buildup. During the washing process, add the extra rinse option to effectively remove detergent residue, dust mites, and allergens. This step is essential if you wash a down comforter, as leftover soap can cause clumping and reduce insulation. If you’re using a high-efficiency washer, manually add water during rinsing to guarantee thorough cleaning. Always follow manufacturers instructions to protect fabric integrity. A proper cycle with mild detergent and an extra rinse also flushes out residual chemicals from manufacturing, like dyes and finishes, leaving your comforter fresh, clean, and safe for sensitive sleepers.
Dry Completely to Prevent Mold
After washing your comforter with a mild, fragrance-free detergent and running an extra rinse to flush out residues, the next step is just as critical-drying it completely to prevent mold and maintain its loft. You’ve got to dry completely, since moisture trapped inside can spawn mold in just 24 to 48 hours. Use a large capacity dryer-7.0 cu. ft. or bigger-to let your comforter tumble freely. Toss in two or three wool dryer balls or clean tennis balls to break up clumps and improve airflow. Pause every 20–30 minutes to fluff the comforter by hand, ensuring even drying. If you choose to air dry, lay it flat outside or hang dry in direct sunlight, flipping it often to expose all layers to fresh air. No matter the method, confirm it’s completely dry-check thick seams and corners-before storing or using.
Store Clean & Dry for Next Use
When storing your comforter, make sure it’s not just clean but bone dry-any lingering moisture can lead to mildew, especially in tightly packed storage. To keep it fresh, always store your comforter in a breathable cotton or mesh bag; these materials allow airflow and prevent humidity buildup. Never use plastic bags-they trap moisture, which can cause musty odors and weaken fabric over time. For smaller comforters, testers found that an old king-size cotton pillowcase works just as well. Before putting it away, air out your comforter in direct sunlight every six months to kill bacteria and refresh fibers. Then, keep it in a cool, dry place, away from sunlight that could cause yellowing. Using breathable storage and proper airflow guarantees your comforter stays soft, clean, and ready for next use.
On a final note
Check your comforter’s label, repair any tears, and pre-treat stains with a gentle remover like OxiClean MaxForce. Use a 5.0+ cu. ft. front-loader on gentle, a mild detergent like Tide Free & Gentle, and an extra rinse. Dry fully on low heat with wool dryer balls to prevent clumping. Never skip the fluff check-testers found hidden moisture leads to mildew. Store clean and compressed in a breathable cotton bag, not plastic.